
How Can We Help?
Quick Setup
Congratulations on your new Xeno Power PC! Let’s start with a few basic steps to follow during the unboxing process.
Avoid Static:
While modern PCs are much more resilient to static shock damage than in the past, it is still a good idea to take precautions to avoid shocking the components inside your PC. Avoid carpeted areas if possible or be barefoot if on carpet. Removing the plastic bag or plastic film from around the PC can generate a lot of static, so make sure to touch a grounded metal object before handling any components within the PC. Simply touching the metal of the case is usually good enough.
Unbox Upside-Down:
We recommend opening the top of your PC box and placing it upside down on the floor or table, then lifting the box off the PC, rather than trying to lift the PC out of the box. Sometimes handles can get stuck in the packing foam, so make sure they are not sticking into the box before lifting.
Find All Your Accessories:
Go through all the packaging to locate all the accessories that come with your PC – you should have at least some of the following: Power Cable, Keyboard, Mouse, WiFi Adapter/WiFi Antennas, and RGB Remote (If Applicable).
Remove Internal Foam:
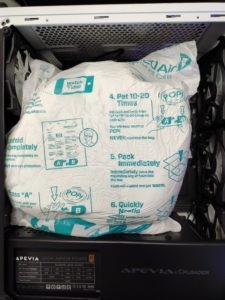
If your PC has a high end or heavy graphics card, you may have a piece of expanding foam on the inside of the system to prevent damage during shipping. Make sure you check the inside of the case before powering on as you definitely don’t want to power the system on with this foam in place.
You will most likely need to use a screwdriver to remove your side panel. The majority of side panels mount in one of two ways, either with visible screws on the side panel corners or with screws at the back.
Save Your Packaging Material! (At least for a while):
After unboxing, don’t immediately toss the packaging material that came with the PC. In case of any immediate service needs, it may be necessary to reuse some of the packaging. It is also possible for small accessories to hide in the packaging material so be careful not to accidentally throw those away.
Once you have used the PC for long enough to be confident there are no issues, you may toss some of the packaging material. We always recommend saving the case box in case you need to transport the PC to avoid any damage during transport. Without inserts, this box may not be protective enough to survive shipping, but helps with transportation in a vehicle and allows you to safely stack items on top of your PC.
Plugging In:
Please make sure you have reviewed Step 1: Unboxing before proceeding with this guide.
Most importantly, make sure that if your PC has any internal packing foam that it has been removed. Plug in the power cord from the computer into a working wall outlet. Ensure the orientation of the plug matches the port on the power supply and that there is a snug fit so that it cannot fall out – it can take a bit of force to insert, so make sure you have it in all the way! Flip the hard switch in the back of the computer to the ‘line’ or on position.
Powering On:
The power button, should be located on top or on the front of the case. Generally, the symbol for power looks like a circle with a line, while the restart symbol looks like a curving arrow, but buttons don’t always have a symbol. Generally it’s the largest button on the case.
Push the power button on top or on front of the case to turn on the PC. If the computer does not turn on and you are currently plugged into a surge protector or power strip, try plugging directly to a wall outlet.
Most PCs require a minimum of a keyboard and display to boot properly. On first power on, it is
recommended to only plug in the necessary peripherals; keyboard, mouse, display, and Ethernet cable if available.
 *Important* If your PC includes a graphics card of any kind, the cable from your monitor to the computer must be plugged in BELOW the audio jacks on the back of the computer – labeled Dedicated in the above picture. Different monitor cables include HDMI, DP, DVI, and VGA. Most new PC’s will only support either HDMI or DisplayPort. If you are not seeing a spot below the audio jacks to plug in the monitor cable, check for any black plastic covers that can be pulled off.
Logging In:
Once your computer boots into Windows, you should be able to log into the “User” user account. No password has been set or is required to log into this account. Passwords can be set and new accounts created from Settings -> Accounts.
Software Overview:
Your Xeno Power PC comes with a full complement of included software and utilities, preinstalled out of the box! Aside from Windows 11 Pro, these include Google Chrome Web Browser, Malwarebytes Free Antivirus, Steam Game Platform, Discord Voice Chat, and 7-Zip Archive Utility. Depending on GPU, your computer will also come preloaded with the Nvidia App or Radeon Software.
Recommended Usage:
Malwarebytes: Malwarebytes is an excellent free antivirus/antimalware program. Upgrade to the Premium version for fully automated scanning, or just remember to open it up and run a scan every week or two, and remove/quarantine whatever it finds. Keeping your computer safe is that easy, and no other antivirus software is needed!
Google Chrome: A free web browser, one of the best alternatives to Microsoft Edge.
Steam: Steam is one of the best platforms to purchase and download your games! After you create or sign into your Steam account, the only configuration required is to create a library folder on your Data hard drive, so you don’t fill up your SSD with games (Guide Here: https://support.steampowered.com/kb_article.php?ref=7418-YUBN-8129) Please note that, for other games such as Warzone, you may have to download a different launcher app, such as the Battle.net launcher.
Discord: The best free voice communication app for talking and messaging your friends! Create a free account and add your friends, or create/join a Discord server to meet and talk to more gamers like you!
7-Zip: Remember WinRAR? Remember how much it bugged you about paying for it? Yeah, that sucked. 7-Zip does everything WinRAR did, and it’s 100% free and open source! Just right-click on a Zip file and you’ll see the option for 7-Zip to extract it. Simple!
Nvidia App / AMD Radeon Software: Keeping your drivers up-to-date is one of the most important things you can do to keep your system running at peak performance. Virtually all other hardware will be automatically kept updated through Windows Update, but your GPU drivers won’t. That’s where the Nvidia App / Radeon Software comes in!
Both apps give you basic streaming/clip recording functionality, and both also offer automatic game settings optimization. Most importantly, however, both will give notifications when your graphics drivers need to be updated – don’t ignore these! Always keep your GPU driver up-to-date, and only install official drivers available through either of these apps.